Pinball EM Test Light
Do you need a test light to help troubleshoot problems with your EM pinball machine? Here’s an easy way to make one for less than $5.
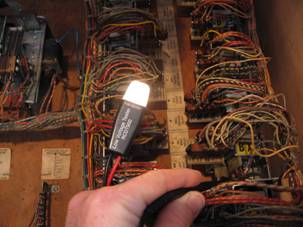
A test light is one way to debug EM pinball machines. Testing is done by connecting one side of the test light to the common coil wire (BLACK in Gottlieb machines) and testing switches along the circuit path starting at the +25V AC power wire (RED-WHITE in Gottlieb machines). Pictures of the test light in action are at the bottom of this page.
I have a test light I made out of a resistor and a #47 bulb, but have been on the lookout for something a bit more durable. When I saw this low-voltage tester in a surplus supply catalog it looked like it would make a good pinball test light, but needed longer leads. The test light could be used as-is, but here is the description of what I did to make it more convenient to use.
Parts List (both from http://www.allelectronics.com/ ):
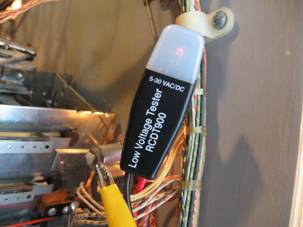
1. LVT-2 : Low voltage tester. $2.50. This is an RCDT900 Door Chime “Diagnostic Tool” made by Broan-NuTone. It is rated 5-30 V AC or DC. http://www.allelectronics.com/index.php?page=search&search_query=lvt-2&x=12&y=4
2. TL-100 : 36” test leads. $2.00. http://www.allelectronics.com/make-a-store/item/TL-100/TEST-LEAD-SET/-/1.html
Other supplies:
3. Electrical tape and heat-shrink tubing (optional)
The conversion to longer leads was not complicated. In short: open case, unsolder old leads, cut off new leads and solder in place, close case. There is really no polarity to the test light, so the leads could be the same color if you have some old ones around. I didn’t think of this in time, but it may be more convenient to make one of the leads an alligator clip. Pictures taken during this conversion are included below.
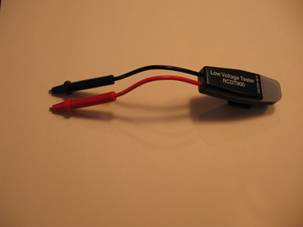
Here is the original tester:
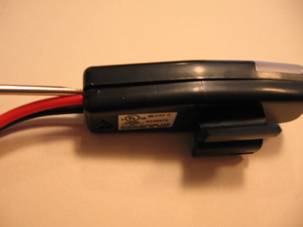
The case is glued shut, but broke open quite easily by prying with a screw driver from the wire end.
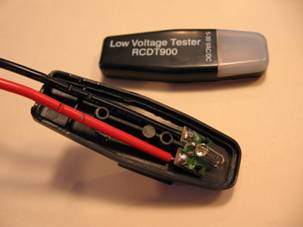
Inside is simply a small incandescent lamp. The small board is slipped over two small plastic pins (i.e. not glued).
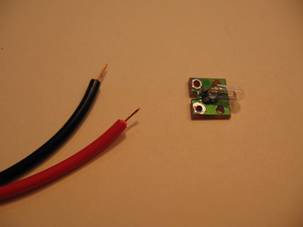
Old wires were removed, banana plugs clipped off new leads, leads stripped, ready to solder.
New leads soldered and board reinstalled.
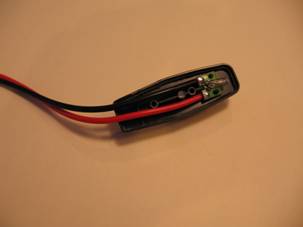
Here is the new & improved test light. I used electrical tape to seal the unit closed along the seams.
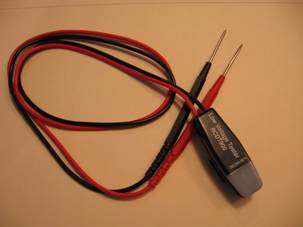
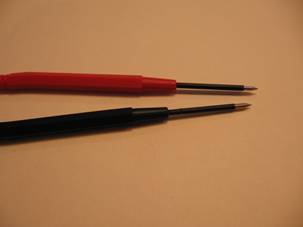
I decided to insulate most of the probe tips with heat-shrink tubing.
Here is the test light in action, testing 25V to BX relay in my Gottlieb Spirit of 76.
The test light will also work on the 6V GI lighting, but indicator light is fairly dim.
If you have any comments or questions, feel free to contact me.
Kerry Imming – kcimming@pobox.com
File: Pinball_EM_test_light.doc Last modified: February 2, 2012